Printable Relief Carving Patterns
adminse
Apr 06, 2025 · 9 min read
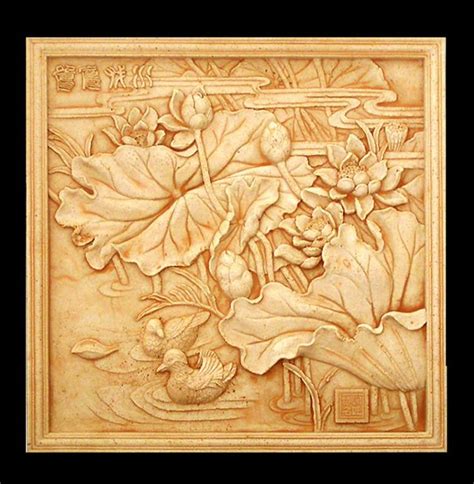
Table of Contents
Unleash Your Inner Artist: A Comprehensive Guide to Printable Relief Carving Patterns
What if the beauty of intricate relief carvings could be accessible to everyone, regardless of skill level? Printable relief carving patterns are revolutionizing the craft world, opening doors to creativity and artistic expression for beginners and experienced carvers alike.
Editor’s Note: This article on printable relief carving patterns has been published today, offering you the latest insights and resources to jumpstart your carving journey. Whether you're a seasoned woodcarver or a curious beginner, this guide provides everything you need to know about finding, using, and mastering printable patterns.
Why Printable Relief Carving Patterns Matter:
Printable relief carving patterns democratize the art of wood carving. No longer is access to complex designs limited to those with exceptional drawing skills or the financial resources to purchase expensive pattern books. These readily available patterns offer a wealth of options, from simple floral motifs to intricate animal portraits, allowing carvers of all levels to explore their creativity and achieve professional-looking results. The affordability and accessibility of printable patterns are transforming the craft, inspiring a new generation of woodcarvers and expanding the possibilities within this traditional art form. Furthermore, the ability to print patterns at various scales allows for customization and adaptation to different project sizes and materials.
Overview: What This Article Covers:
This article delves into the world of printable relief carving patterns, covering everything from understanding different pattern types and finding reliable sources to mastering transfer techniques and selecting appropriate carving tools. Readers will gain actionable insights, learn about various carving styles, and discover resources to help them embark on their own relief carving adventures.
The Research and Effort Behind the Insights:
This article is the result of extensive research, drawing upon the collective knowledge of experienced woodcarvers, online resources, and a careful examination of various printable pattern sources. We've analyzed different pattern formats, transfer methods, and carving techniques to provide comprehensive and accurate information for readers. Every recommendation is supported by practical experience and a commitment to delivering reliable, actionable advice.
Key Takeaways:
- Definition and Core Concepts: A clear understanding of relief carving, its various styles, and the benefits of using printable patterns.
- Finding and Selecting Patterns: Exploring different online and offline resources for high-quality printable patterns.
- Transferring Patterns: Mastering various techniques for accurately transferring patterns onto your carving material.
- Carving Techniques: Understanding basic relief carving techniques and adapting them to different patterns and materials.
- Materials and Tools: Choosing the right tools and materials for successful relief carving projects.
- Advanced Techniques: Exploring more advanced techniques such as layering, undercutting, and creating depth.
- Inspiration and Design Adaptation: Finding inspiration and learning to adapt patterns to suit your creativity and skill level.
Smooth Transition to the Core Discussion:
Now that we understand the significance of printable relief carving patterns, let's explore the key aspects that will empower you to create stunning relief carvings.
Exploring the Key Aspects of Printable Relief Carving Patterns:
1. Definition and Core Concepts:
Relief carving is a sculptural technique where the carved image projects from the background plane. Unlike carving in the round, which creates a three-dimensional object free from a background, relief carving keeps the image attached to a supporting surface. There are various types of relief carving, including:
- Low Relief (Bas-relief): The image projects only slightly from the background, with minimal depth.
- High Relief: The image projects significantly from the background, with a substantial amount of depth and three-dimensionality.
- Undercutting: A technique where the background is carved away from beneath the image to create more dramatic shadow and depth.
Printable relief carving patterns provide outlines and details of the design, guiding the carver in removing material to create the desired image. This allows for intricate designs to be replicated accurately, even by beginners.
2. Finding and Selecting Patterns:
Numerous resources offer printable relief carving patterns. These include:
- Online marketplaces: Sites like Etsy, Creative Market, and others offer a wide selection of digital patterns, often categorized by style, subject matter, and skill level.
- Online craft blogs and websites: Many craft websites and blogs offer free or paid patterns, often accompanied by tutorials and tips.
- Pattern books: While not strictly "printable," pattern books offer a tangible collection of designs that can be traced or photocopied.
When selecting patterns, consider your skill level, the type of wood you'll be using, and the desired level of detail. Start with simpler patterns if you're a beginner and gradually progress to more complex designs as your skills develop.
3. Transferring Patterns:
Accurately transferring the pattern onto your carving material is crucial. Several methods exist:
- Tracing: Place the printed pattern against your wood and trace the design with a pencil or tracing tool.
- Carbon Paper: Place carbon paper between the pattern and the wood; trace the design, and the carbon paper will transfer the image.
- Glue Stick Method: Apply a thin layer of glue stick to the back of the printed pattern, position it on the wood, and press firmly. Once dry, carefully peel away the paper, leaving a faint outline.
Choose the method that best suits your material and personal preference. Experiment with different techniques to find what works best for you.
4. Carving Techniques:
Relief carving typically involves using a variety of carving tools to remove material gradually, creating depth and shaping the image. Common tools include:
- Chisels: Used for removing large amounts of material and shaping the overall form.
- Gouges: Used for creating curves and shaping details.
- V-tools: Used for creating fine lines and detail work.
Start by carving the outlines of the design, then gradually remove material from the background to create depth. Use different tools to achieve various effects and textures. Remember to work carefully and avoid removing too much material too quickly.
5. Materials and Tools:
Choosing appropriate materials and tools is essential for success. Consider:
- Wood: Basswood, butternut, and limewood are popular choices for carving due to their softness and ease of carving. Harder woods are suitable for experienced carvers who want more durability.
- Carving Tools: Invest in quality carving tools, starting with a basic set and expanding as needed.
- Safety Gear: Always wear safety glasses and a dust mask to protect yourself from flying wood chips and dust.
6. Advanced Techniques:
As your skills improve, explore advanced techniques such as:
- Layering: Carving multiple layers of depth to create a three-dimensional effect.
- Undercutting: Carving away material from underneath the image to create dramatic shadows and depth.
- Texture: Adding texture to the carving using various tools and techniques to enhance realism and interest.
7. Inspiration and Design Adaptation:
Don't be afraid to adapt patterns to your liking. Experiment with different carving styles, adding personal touches to make the designs your own. Find inspiration from nature, art, and your surroundings.
Exploring the Connection Between Pattern Complexity and Carving Skill Level:
The relationship between pattern complexity and carving skill level is crucial. Beginners should start with simpler patterns featuring bold outlines and minimal detail. This allows them to practice basic techniques and gain confidence before tackling more challenging designs. More intricate patterns, with their fine details and multiple layers, are best suited for experienced carvers who have mastered fundamental techniques. Ignoring this connection can lead to frustration and potentially damage the carving material.
Key Factors to Consider:
- Roles and Real-World Examples: A beginner's carving of a simple flower pattern will differ significantly from an expert's rendering of a detailed bird in high relief. The complexity of the pattern dictates the skill level required, and the final product reflects this relationship.
- Risks and Mitigations: Attempting a complex pattern with insufficient skills can lead to a ruined carving. Starting with simpler designs and gradually increasing complexity mitigates this risk.
- Impact and Implications: Successfully completing a complex carving using a detailed pattern boosts confidence and motivates further learning. Conversely, a failed attempt can discourage beginners.
Conclusion: Reinforcing the Connection:
The connection between pattern complexity and carving skill is a fundamental aspect of successful relief carving. By carefully selecting patterns that align with one's skill level, carvers can maximize their success and enjoy the creative process.
Further Analysis: Examining Pattern Sourcing in Greater Detail:
The variety of sources for printable relief carving patterns presents both opportunities and challenges. It's essential to carefully evaluate the quality, accuracy, and detail of each pattern before purchasing or downloading. Consider factors such as the resolution of the digital image, the clarity of the lines, and the overall aesthetic appeal. Free patterns may be less detailed or have copyright restrictions. Paid patterns from reputable sellers offer higher quality and more comprehensive support.
FAQ Section: Answering Common Questions About Printable Relief Carving Patterns:
Q: What types of wood are best for relief carving?
A: Softwoods like basswood and balsa are ideal for beginners due to their ease of carving. Hardwoods like maple or oak require more experience and sharper tools.
Q: What tools do I need to get started?
A: A basic set of carving chisels and gouges, a mallet, and safety glasses are essential.
Q: How do I prevent the pattern from smudging or fading during carving?
A: Use a waterproof marker to trace the pattern or consider using a transfer method like carbon paper or the glue stick method for a more permanent imprint.
Practical Tips: Maximizing the Benefits of Printable Relief Carving Patterns:
- Start Simple: Choose patterns with clear lines and minimal detail for your first projects.
- Practice Regularly: Consistent practice helps to develop your skills and confidence.
- Experiment with Different Techniques: Try different transfer methods and carving tools to find what works best for you.
- Seek Feedback: Share your work with others and ask for constructive criticism.
- Embrace Imperfection: Don't be afraid to make mistakes; they are part of the learning process.
Final Conclusion: Wrapping Up with Lasting Insights:
Printable relief carving patterns are an invaluable tool for woodcarvers of all levels. They open doors to creativity, allowing individuals to explore their artistic talents and create beautiful, intricate carvings. By carefully selecting patterns, mastering transfer techniques, and practicing regularly, anyone can unlock the joy and satisfaction of this rewarding craft. The world of relief carving is waiting to be explored—start your journey today!
Latest Posts
Latest Posts
-
Scissor Practice Printable
Apr 08, 2025
-
Scientist Printable
Apr 08, 2025
-
Schrute Bucks Printable
Apr 08, 2025
-
Scattergories Game Printable
Apr 08, 2025
-
Scary Printable Coloring Pages
Apr 08, 2025
Related Post
Thank you for visiting our website which covers about Printable Relief Carving Patterns . We hope the information provided has been useful to you. Feel free to contact us if you have any questions or need further assistance. See you next time and don't miss to bookmark.
